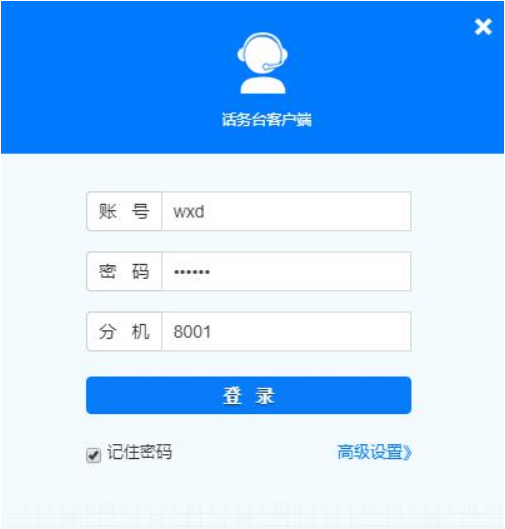
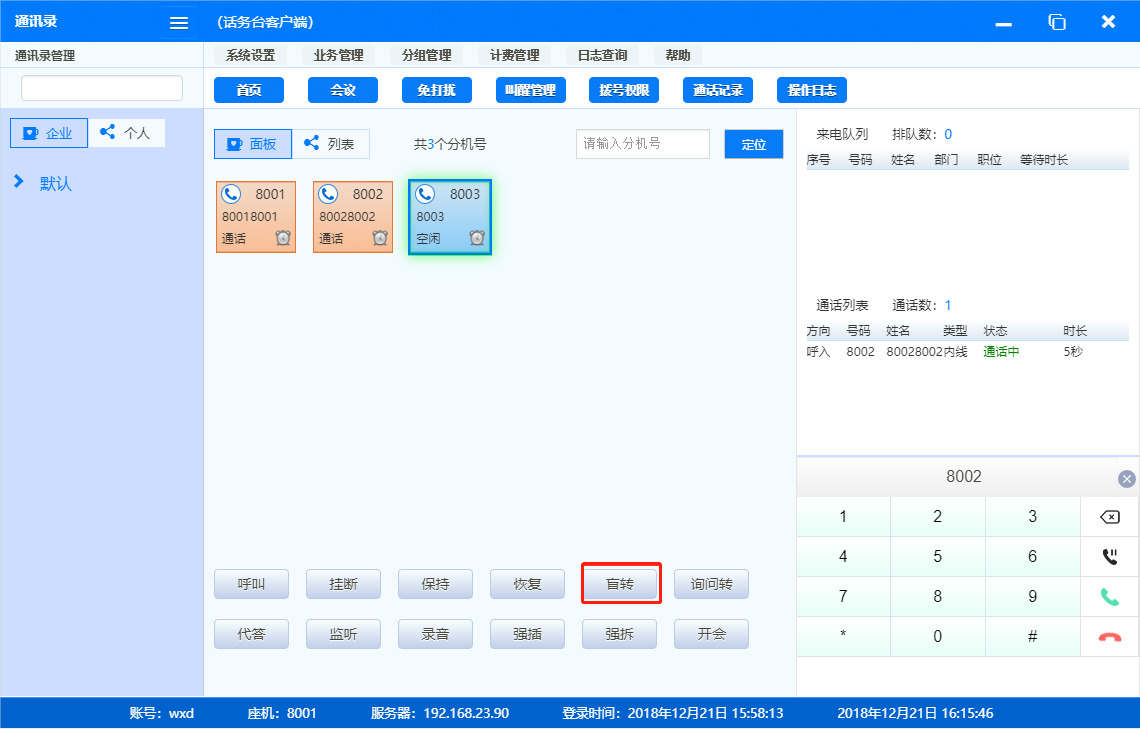
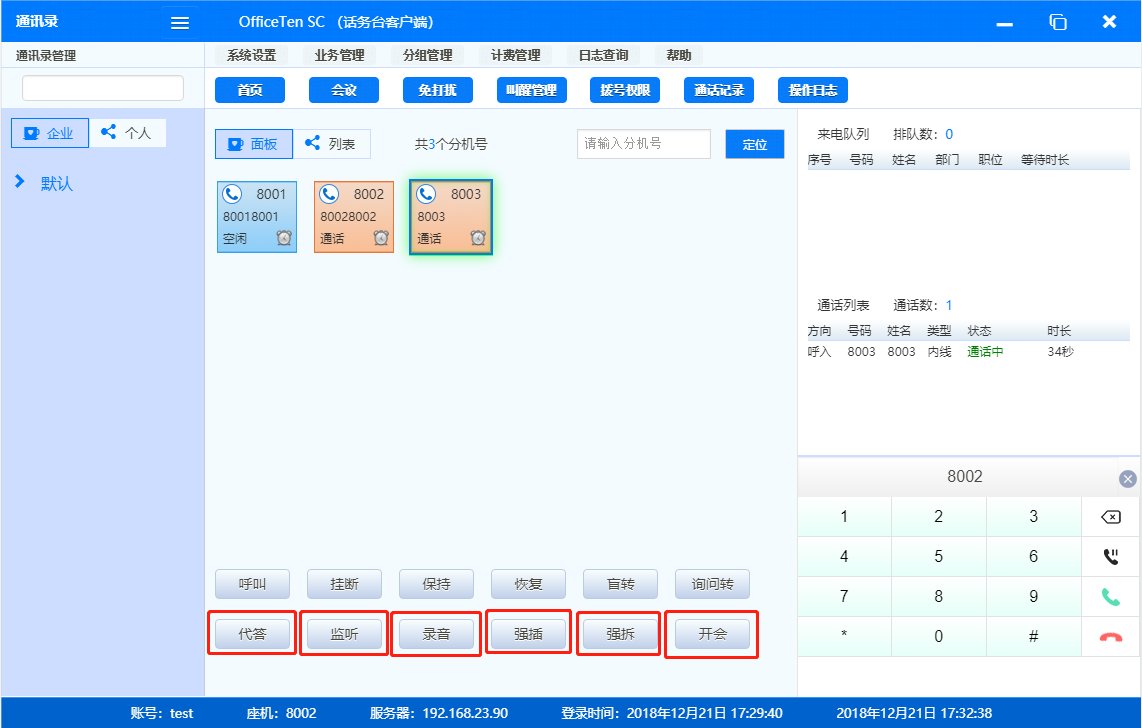
Attendant console home page operation interface
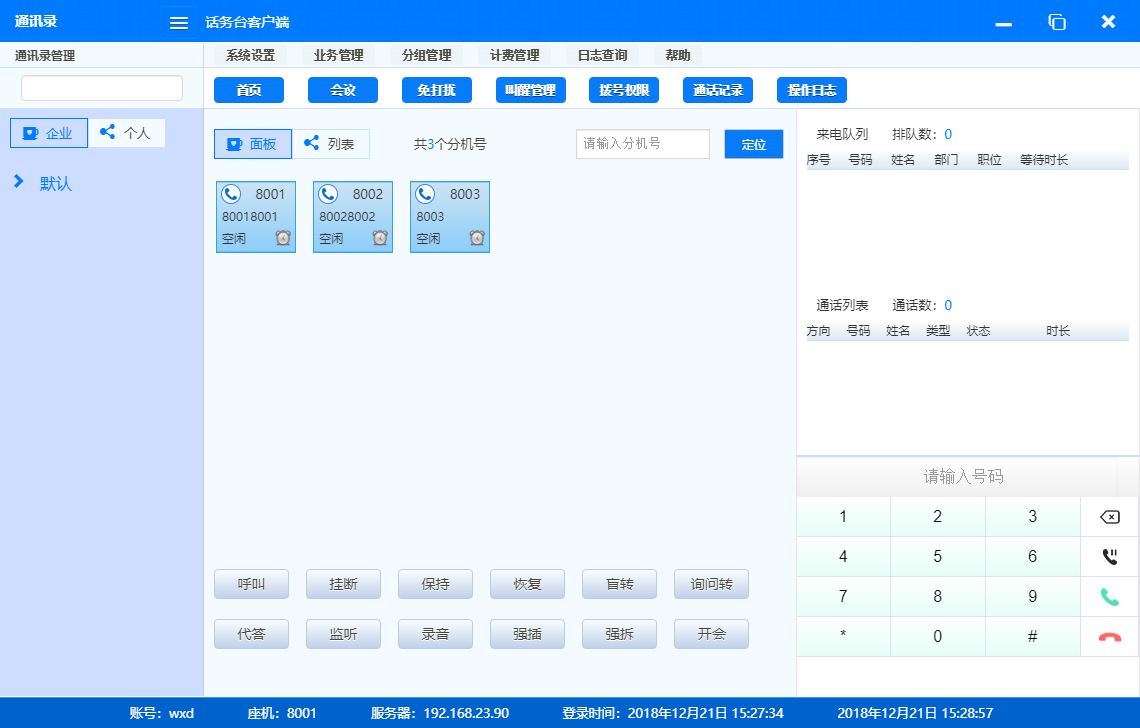
The homepage is mainly divided into the following modules
1) Menu: Open the configuration and view interface of each function through the menu. Frequently used functions are displayed in blue button style, which is convenient and quick to operate;
2) Extension: By default, it is displayed in the form of a panel, displaying the extension information, and you can right-click to set the extension authority and part of the business. Support switching to list mode;
3) Business buttons: click the button directly or click the button after selecting the extension in the corresponding state to realize various services;
4) Queue and call list: The call queue displays the caller numbers in the queue, and the call list displays the number of the call with the attendant. The related information of the number is displayed in the list, and the right button can be used;
5) Dial pad: You can directly dial, call, hang up, hold and other operations through the dial pad.
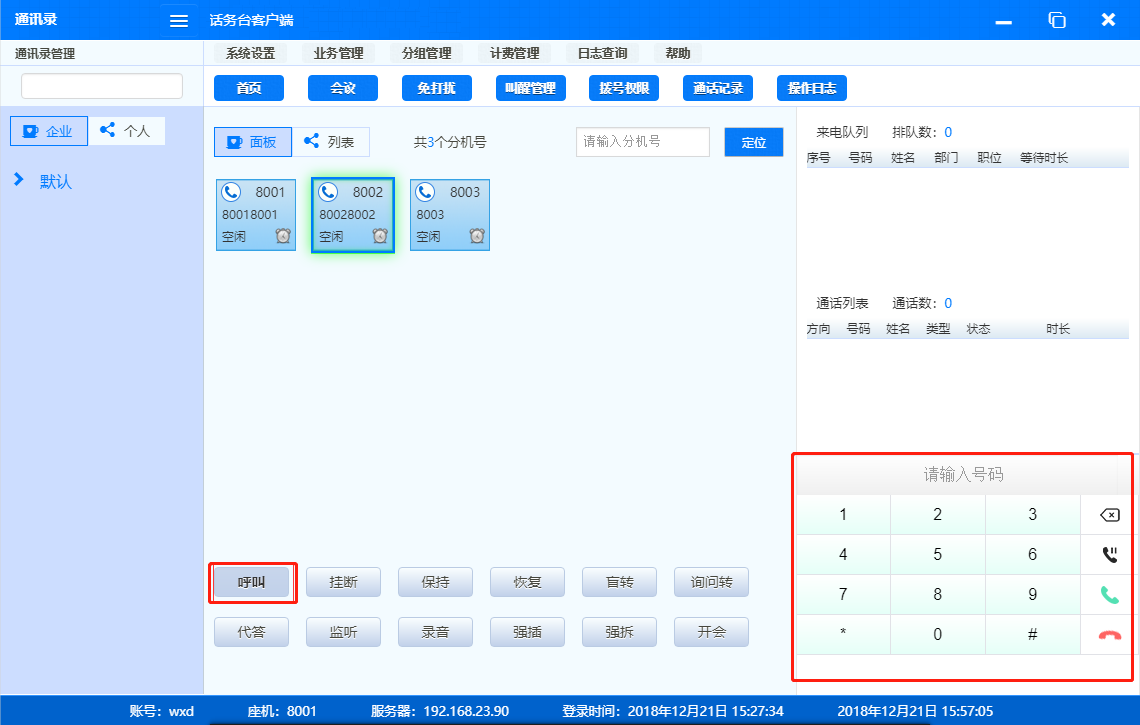
Basic call
Initiating a call: There are two ways to initiate a call;
1) After selecting the extension, click the <Call> button;
2) In the dial pad, enter the number to be called, and click the <Call> icon.
Answer the call
When there is an incoming call, the console software will display the incoming call pop-up screen in the lower right corner of the desktop, and you can click to answer or close the rejection directly.
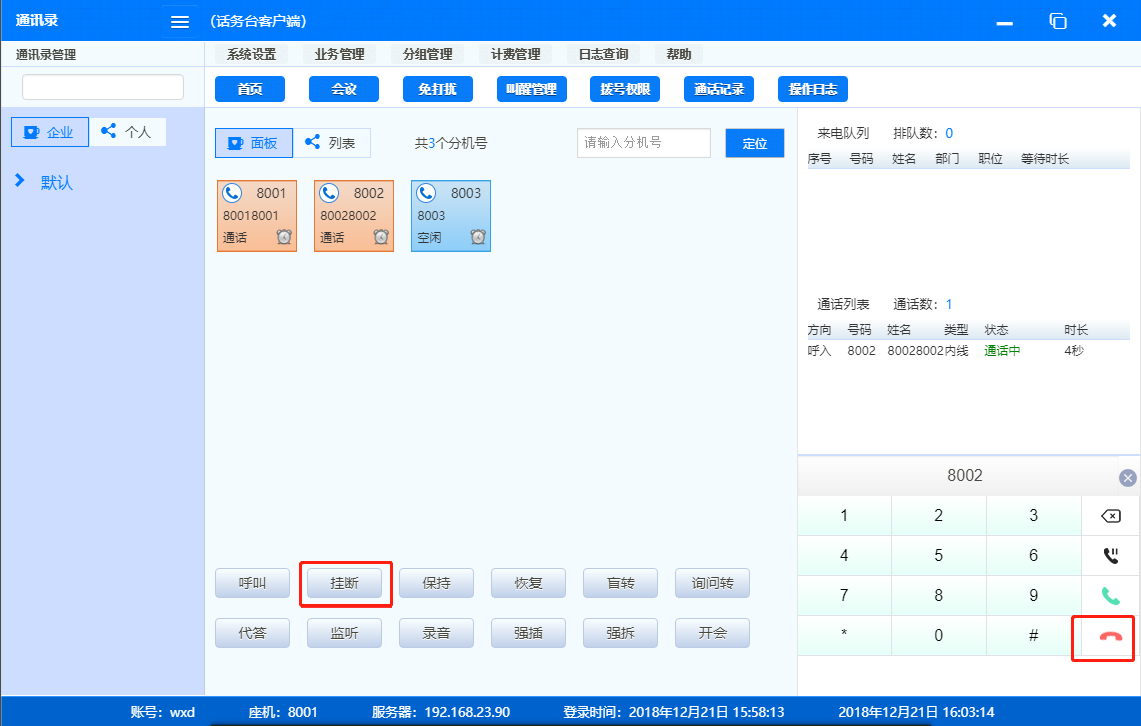
Hang up the call
There are two ways to hang up the call:
1) Click the <Hang Up> button;
2) In the dial pad, click the <hang up> icon.
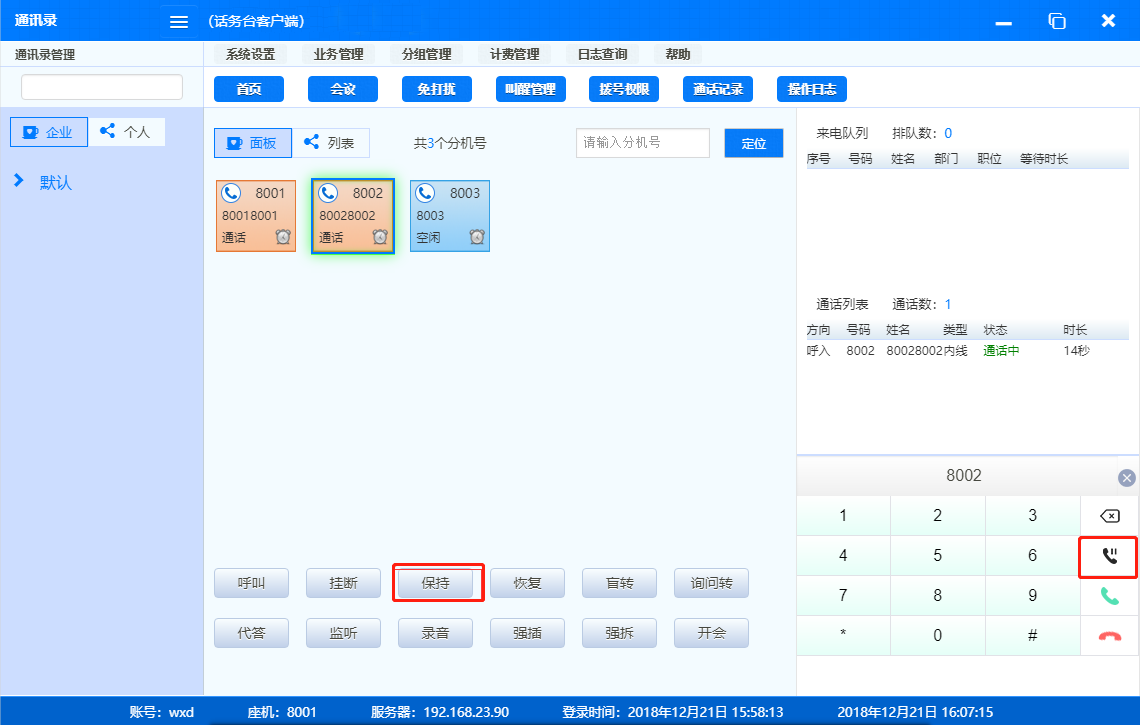
Keep/recover
There are two ways to keep the call:
1) During a call, select the extension of the call and click the <Hold> button;
2) Directly click the <Hold> icon in the dial pad.
There are two ways to resume the call:
1) During a call, select the extension to be held and click the <Resume> button;
2) Directly click the <Restore> icon on the dial pad.

Control business
Blind transfer/inquiry transfer
1) Blind transfer can transfer the call directly to a third party.
During a call, after selecting the third-party extension to be transferred, click the <Blind Transfer> button. The other party will directly transfer to call the third party;
2) Inquiry transfer can be done during the call, first the third party call, and then transfer the call to the past.
During a call, after selecting the third-party extension to be transferred, click the <Ask Transfer> button. The attendant will talk to the third party first, and after the attendant hangs up the call, the other party will establish a conversation with the third party.
Answer
When the extension rings, the attendant selects the extension and clicks the <pickup> button, the attendant will answer the call on behalf of the extension.
monitor
When the extension is talking, the attendant selects the extension and clicks the <monitor> button, the attendant can monitor the content of the conversation between the two parties, but the calling party cannot hear the attendant's voice.
Recording (only support cloud PBX)
When the attendant is talking, click the <Record> button, and after hearing a beep, the call will be recorded. (Note: Attendant console recording only supports recording the call of the attendant itself)
Force in
When an extension is talking, the attendant selects the extension and clicks the <Forced Barge> button, the attendant can join both parties in the call and start a three-way conversation.
Forced demolition
When the extension is talking, the operator selects the extension and clicks the <Forced Release> button, and both parties will be forced to hang up.
Meeting (only support cloud PBX)
The attendant selects the extension and clicks the <Conference> button, the extension will be pulled into the conference.
Click the <Conference> button to enter the conference room for conference control operations such as pulling/kicking, mute/unmute, etc.
Setting up business
Do not disturb
Do not disturb service supports single quick setting and batch setting.
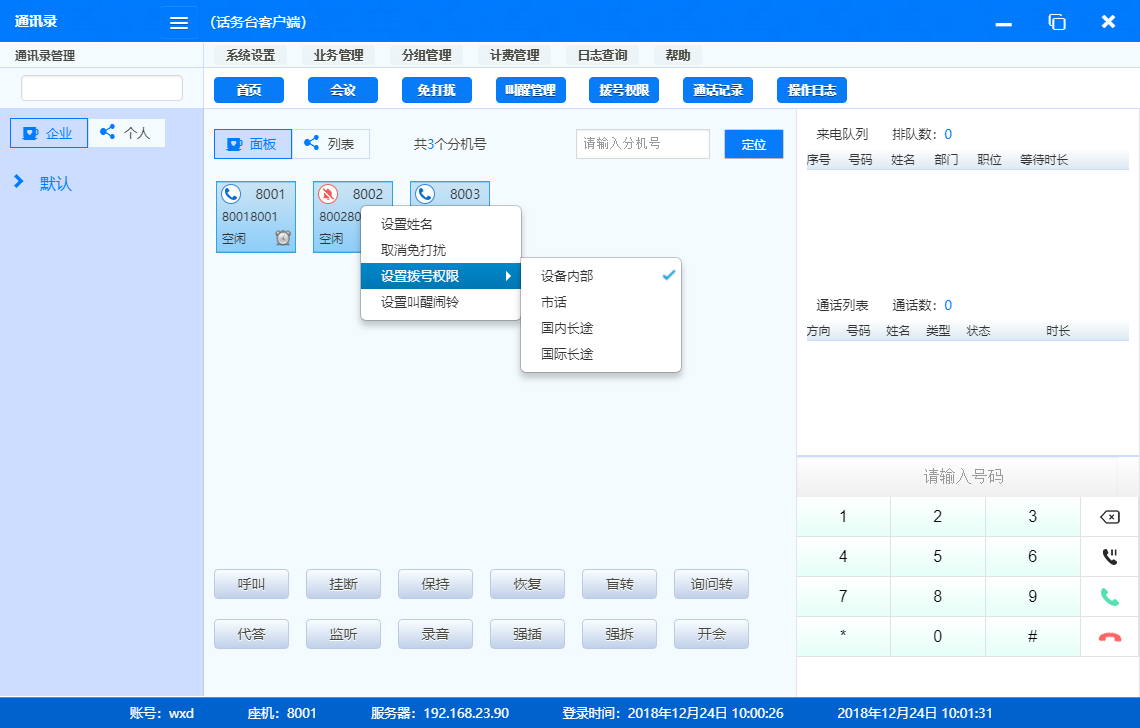
1) Quick setting: Right-click the extension and select Do Not Disturb. After setting DND, the extension status will change to DND.
2) Batch settings: Click Business Management> Do Not Disturb Management, the configuration interface is displayed as follows, you can select extensions, permissions, and confirm that batch settings are completed.
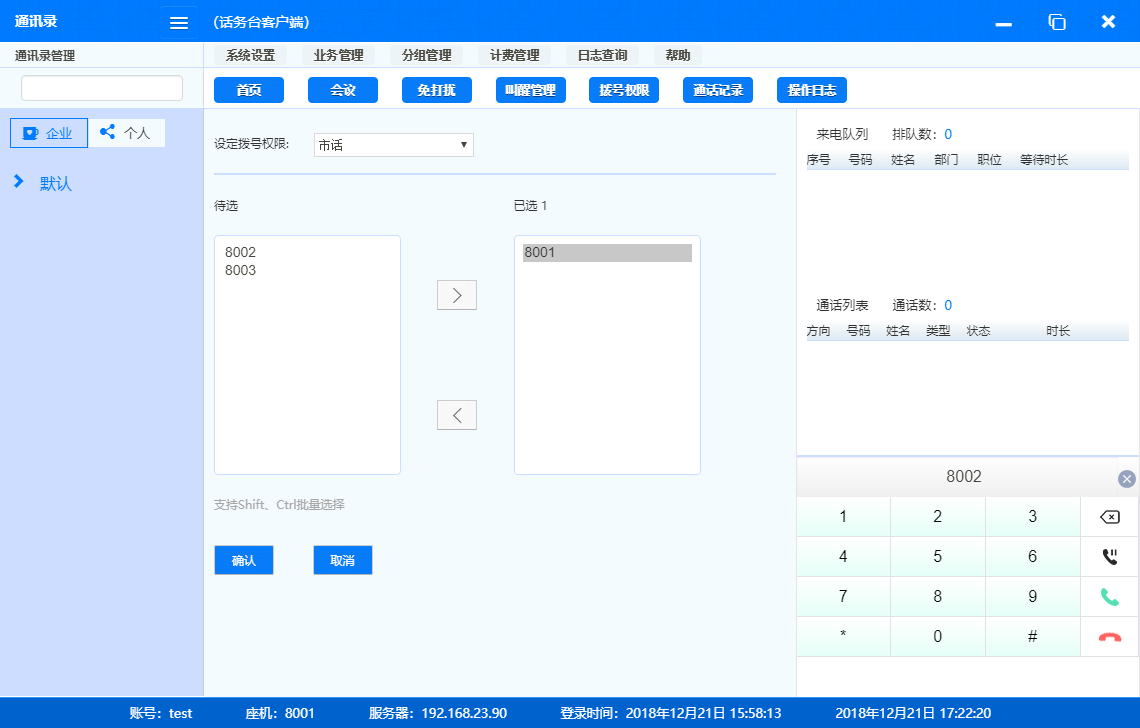
Dialing authority
Dialing authority supports single quick setting and batch setting.
1) Quick setup
2) Right-click the extension and select Set Dialing Authority to set the dialing authority of the extension.
3) Batch setting: Click Business Management> Set Dialing Authority, the configuration interface is displayed as follows, you can select the extension and authority, and confirm that the batch setting is completed.
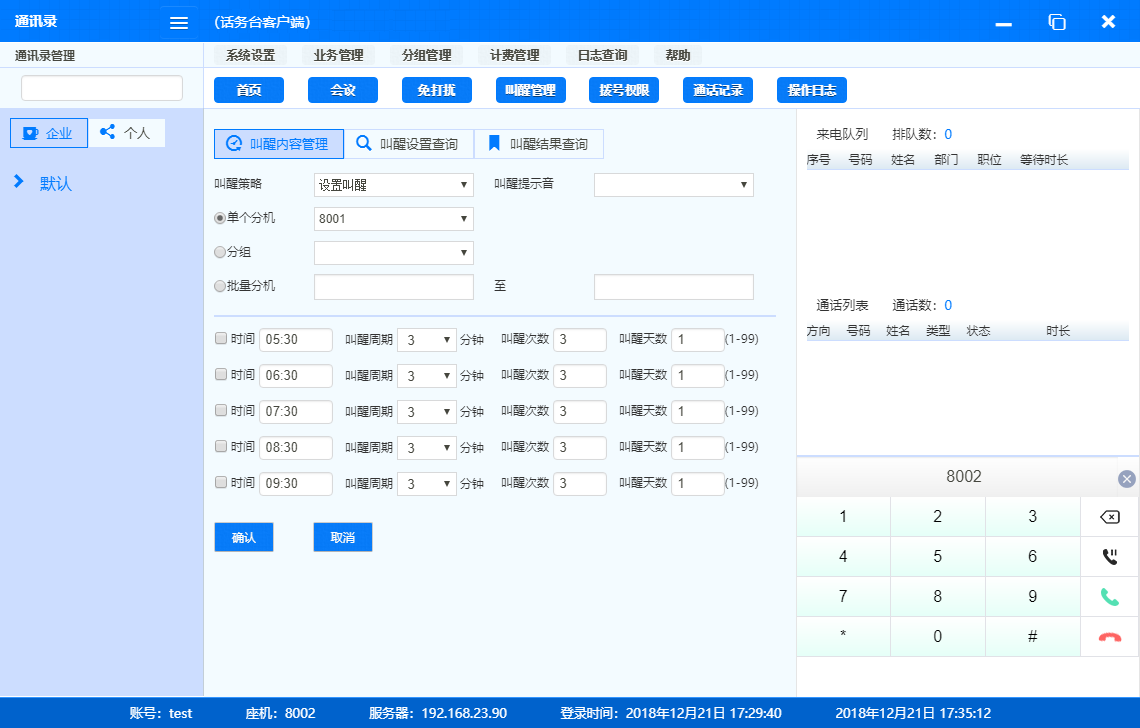
Wake up with alarm clock
Click Business Management> Wake Up Management to enter the wake up content management interface. The wake-up service can be set for single or multiple extensions on this interface.
The wake-up setting query interface can query whether the extension has activated the wake-up service; the wake-up result query interface can query whether the historical wake-up result is successful.
Night service settings
When the attendant goes offline, he can choose to forward all incoming calls in the call queue to a designated night service number. Click Business Management>Night Service Settings,
Enter the night service setting interface, you can select the prompt sound when the night service takes effect, and where to go.
Address book
The built-in address book of the attendant console has the following two types:
1) Enterprise address book: The enterprise address book shared by all operators, which can be viewed by all operators.
2) Personal address book: The personal address book of the current operator, other operators cannot view it.
Take the corporate address book as an example: Right-click on a part to add contacts and some operations. Right-click the added contact, you can manage the contact and dial the number.
Click Business Management>Address Book Management to display the interface, and you can perform batch operations on the address book.
Log
Billing management
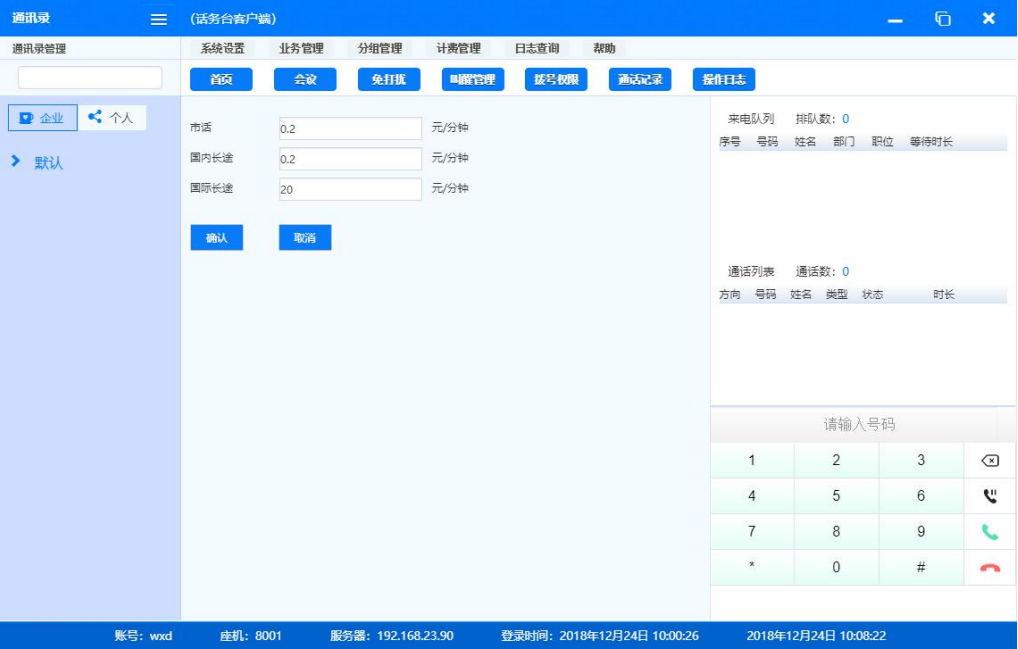
1) Rate setting
Click Billing Management>Rate Settings to display the tariff setting interface, where you can set the tariffs for local calls, domestic long distances, and international long distances;
2) The user's billing bills will be recorded in the billing bills. Click Billing Management> Billing Bills to display the call records.
Recording management
The user's call recording will be recorded in the recording record. Click Business Management> Recording Management to display the recording record.
call records
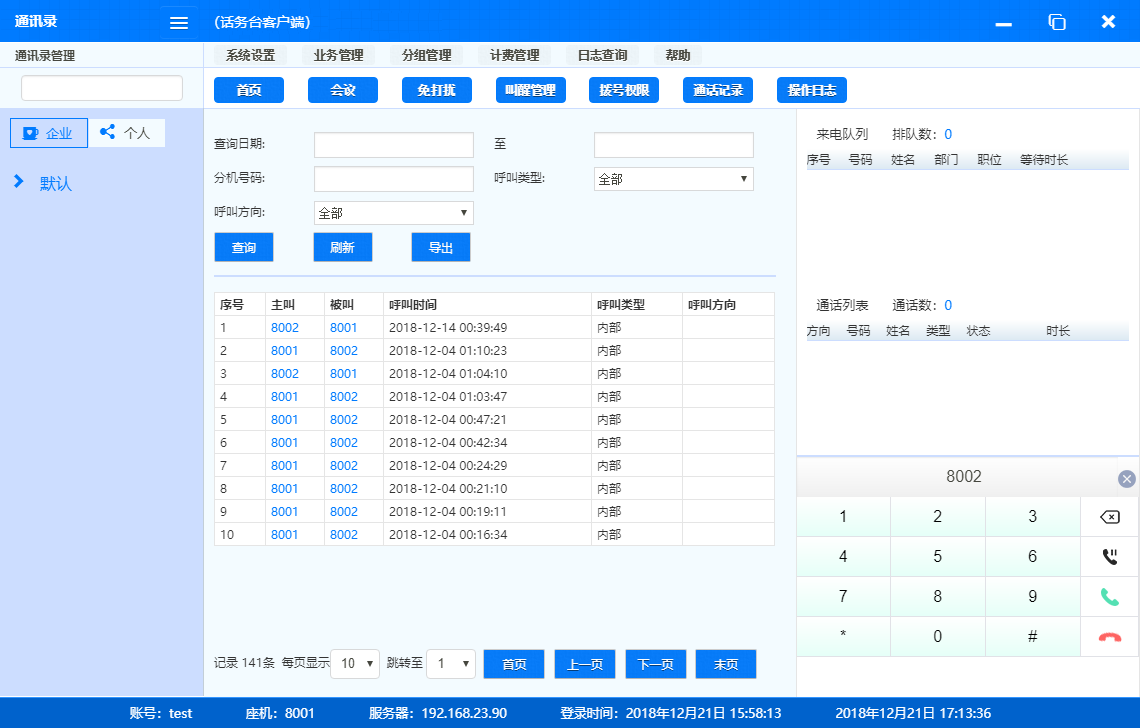
All calls of the user will be recorded in the call log. Click Log query> Call log to display the call log.
Handover record
The attendant's handover will be recorded in the handover record. Click Log Query> Handover Record to display the handover record.
Operation log
Operator's operations will be recorded in the operation log. Click Log Query> Operation Log to display the operation log.
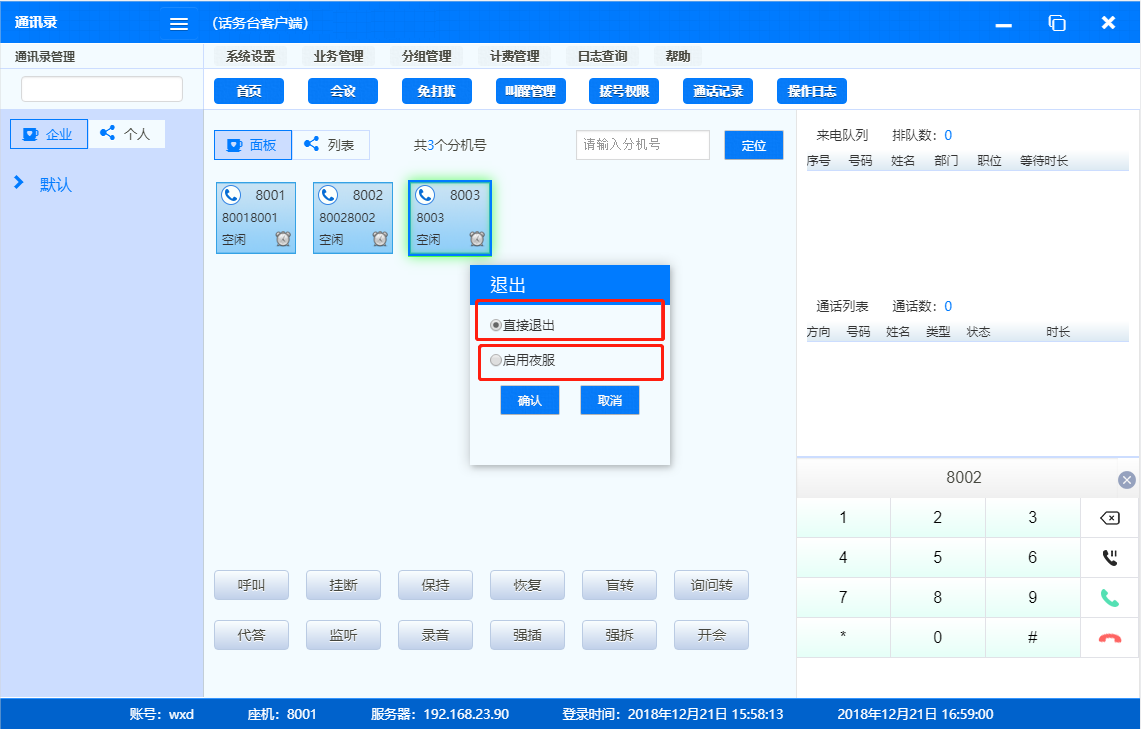
quit
Exit directly
Click System Settings> Exit, and the exit option will pop up. After you choose to exit directly, the attendant will be offline and the attendant will no longer receive incoming calls.
Enable night service
When you log out, you can choose to enable the night service option. After the night service is enabled, when there is a call queue, the call will be transferred to the night service number.
Handover
The attendant console provides the shift shift function, you can switch the operator account directly, click System Settings> Switch shift. Display the transfer interface, fill in the operator account and password for the transfer, confirm the transfer, and log in with the new operator account.
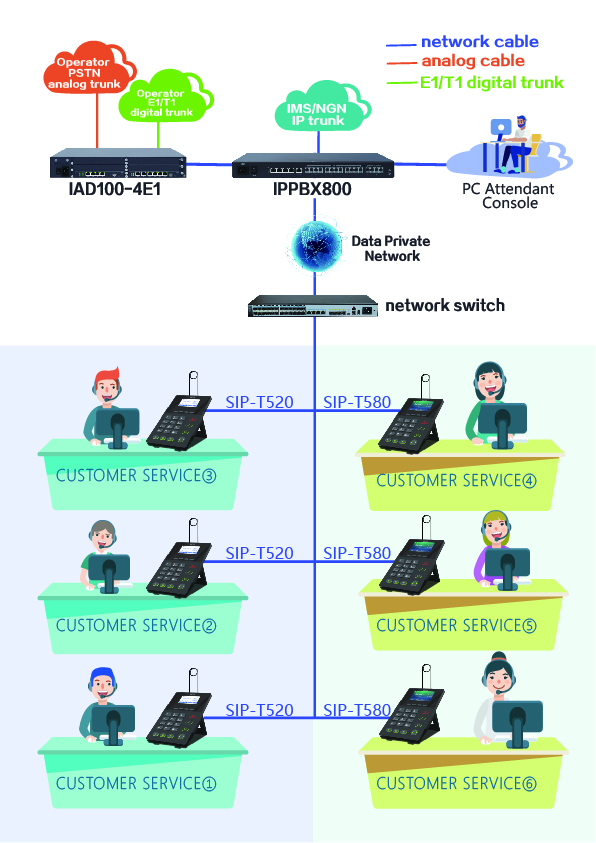
---PC Attendant Console---